4. Application examples in actual engineering
4.1 Welding deformation and stress analysis of air conditioning compressor
Three 8mm holes are uniformly opened along the circumference of the upper cylinder wall of the compressor cylinder, and then the plug is welded by tungsten argon arc welding to connect the cylinder and the bearing. Mainly analyze the eccentricity caused by the welding of the cylinder and the upper bearing and the change of the shape of the end of the cylinder. Figure 3 is a residual deformation diagram of the calculation model of the post-weld compressor. The radial deformation of the end of the cylinder is like a "flower". The calculation model has been used to study the welding heat input, the assembly gap, the time difference of the three welds, the deviation of the position of the plug hole and the influence of the fixture on the eccentricity and "flower" deformation after welding. The simulation results are in good agreement with the measured data. The residual stress distribution of the entire structure can also be obtained by calculation. The maximum principal stress appears in the heat affected zone around the plug joint, and the value can reach the yield stress of the material.
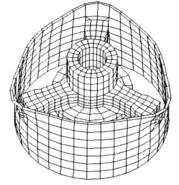
Figure 3 Residual deformation of compressor welding
4.2 Welding deformation analysis of 600MW nuclear power condenser
The three-dimensional welding thermoelastic finite element method was used to predict the welding deformation of tube-plate joints, pipe joints, large plates and stiffened plates in 600MW condensers, which provided a basis for actual production. Figure 4 shows the temperature field at a certain point in the welding process of the semicircular tubesheet model. The calculation results show that the axial total shrinkage of the three welded pipes is about 0.86 mm. The position and shape of the eight tube holes on the baffle also changed, with an "egg-shaped" change in which the radial diameter increases and the circumferential diameter decreases. At the same time, it can be predicted that the radial contraction on the diaphragm decreases with the distance from the central axis, so that the reference for the design of the opening position can be provided.
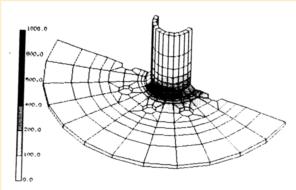
Figure 4 Temperature field at a certain point in the process of tube sheet welding
4.3 Welding precision control in automobile manufacturing
4.3.1 Welding deformation of high precision torque converter
The precision of the hydraulic torque converter used in the car is very high. Therefore, how to control the welding deformation and ensure the dimensional accuracy of the product is a key to the success of the welding process. The two methods of thermal elastoplastic finite element and residual plastic deformation were used to simulate and analyze the welding deformation of the torque converter. Figure 5 shows the welding deformation of the torque converter. The calculation analysis shows that the deformation of the upper and lower cover assemblies of the torque converter will affect the clearance between the inner surface of the upper cover and the inner pressure ring and the parallelism and verticality of the top surface of the connecting block, so the design and welding of the assembly fixture This factor must be considered in the pre-assembly to ensure the technical requirements for the size and shape of the product after welding. The welding deformation increases with the increase of the welding line energy, and the axial shrinkage during the double welding will also increase significantly. Therefore, the high power and high speed electron beam single pass welding should be selected, which can ensure the penetration and reduce the welding. Line energy, which greatly reduces weld distortion.
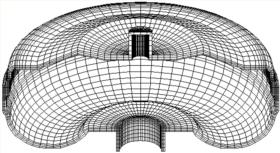
Figure 5 Welding deformation of the torque converter
4.3.2 Welding deformation of the car sub-frame
The car sub-frame is very complicated, and it is required to analyze the deformation law of the 21 welds connecting the front beam, the rear beam, the left beam and the right beam when welding the sub-frame assembly. For this purpose, the residual plastic deformation finite element method was used for the analysis. Since the sub-frame is composed of four thin-walled beam structures of the front beam, the rear beam, the left beam and the right beam, a four-node plate and shell unit is adopted. Figure 6 is a deformation diagram in the X direction after the sub-frame assembly is welded. When calculating the sub-frame assembly of the Buick sedan, the deformation law data of the 21 welds connecting the front beam, the rear beam, the left beam and the right beam can be used as reference for the reserved deformation amount and fixture design during the welding process design. The success of this example is a major breakthrough, and it provides a broad prospect for deformation analysis of large complex structures.
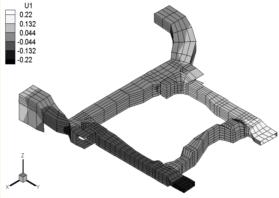
Figure 6 Deformation diagram of the sub-frame assembly in the X direction after welding
4.3.2 Analysis of the assembly process of car body-in-white spot welding
Through the spot welding axisymmetric model, the contact characteristics, part deformation and transient thermal process during the spot welding assembly of the body parts were analyzed. The results show that, in terms of assembly precision, the deformation of the part is mainly affected by the electrode force and the initial test gap. When the solder joint spacing of the spot welding of typical body parts is used, the influence of the thermal effect of the spot welding process on the deformation of the part can be neglected. Assembly deviation analysis provides the basis. In addition, to ensure the positioning quality of the body parts and reduce the gap of the parts, the electrode wear can be reduced and the electrode life can be improved. Figure 7 shows the temperature distribution during spot welding.
Previous Next
High chromium steel ball features:
1. High chromium steel balls have a high hardness, usually between 60-66 HRC, which makes them have good wear resistance and pressure resistance.
2. The hardness of high chromium steel ball makes it have excellent wear resistance and can maintain a long service life in a wear environment.
3. High chromium steel ball has high tensile strength and compressive strength, and can withstand greater external force.
4. High chromium steel ball has good corrosion resistance and can be used for a long time in acid and alkali environment.
5. High chromium steel ball has good high temperature stability and can maintain good performance in high temperature environment.
6. High chromium steel ball has a good surface finish, which can reduce friction resistance and energy loss.
7. The production process of high chromium steel balls is relatively fine and can achieve high precision requirements.
8. The low wear rate of high chromium steel ball enables it to maintain good performance for a long time.
9. The manufacturing process of high chromium steel ball makes it have good balance and can maintain stability in high-speed rotation or vibration environment.
10. High chromium steel balls have good plasticity and can be formed and processed by cold working or hot working.
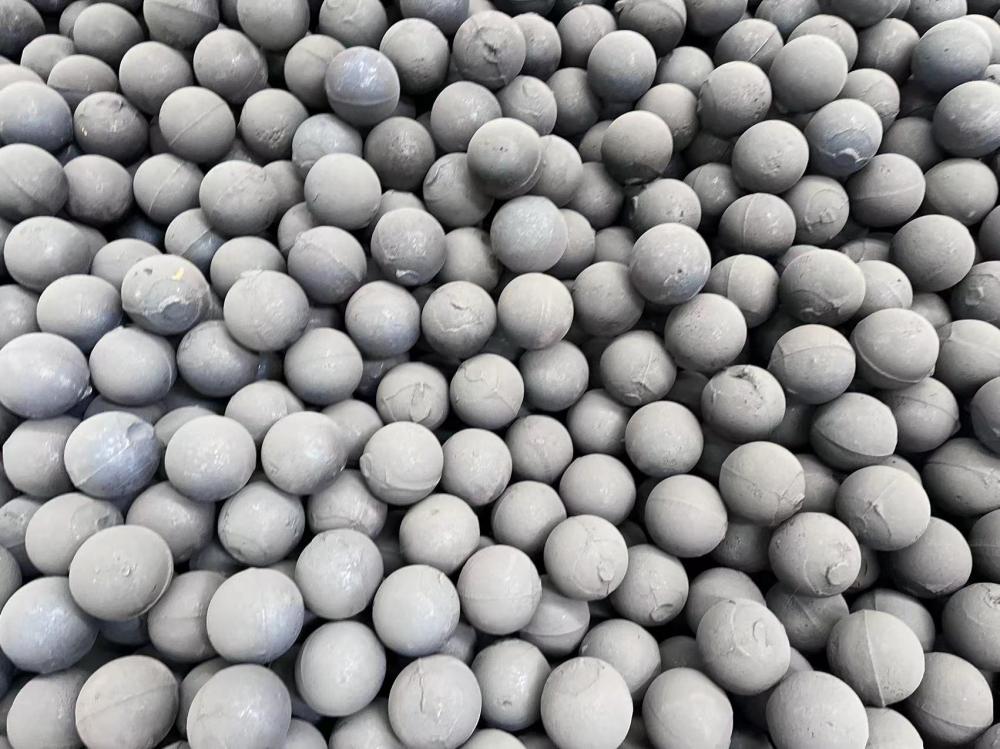
Abrasives That Wear Well,Alloy Chrome Steel Ball,High Hardness Alloy Steel Ball,High Hardness Cast Steel Ball
Xuzhou Surun wear-resistant material Co., LTD , https://www.suruntools.com